How do you fill in the blank?
January 20, 2012
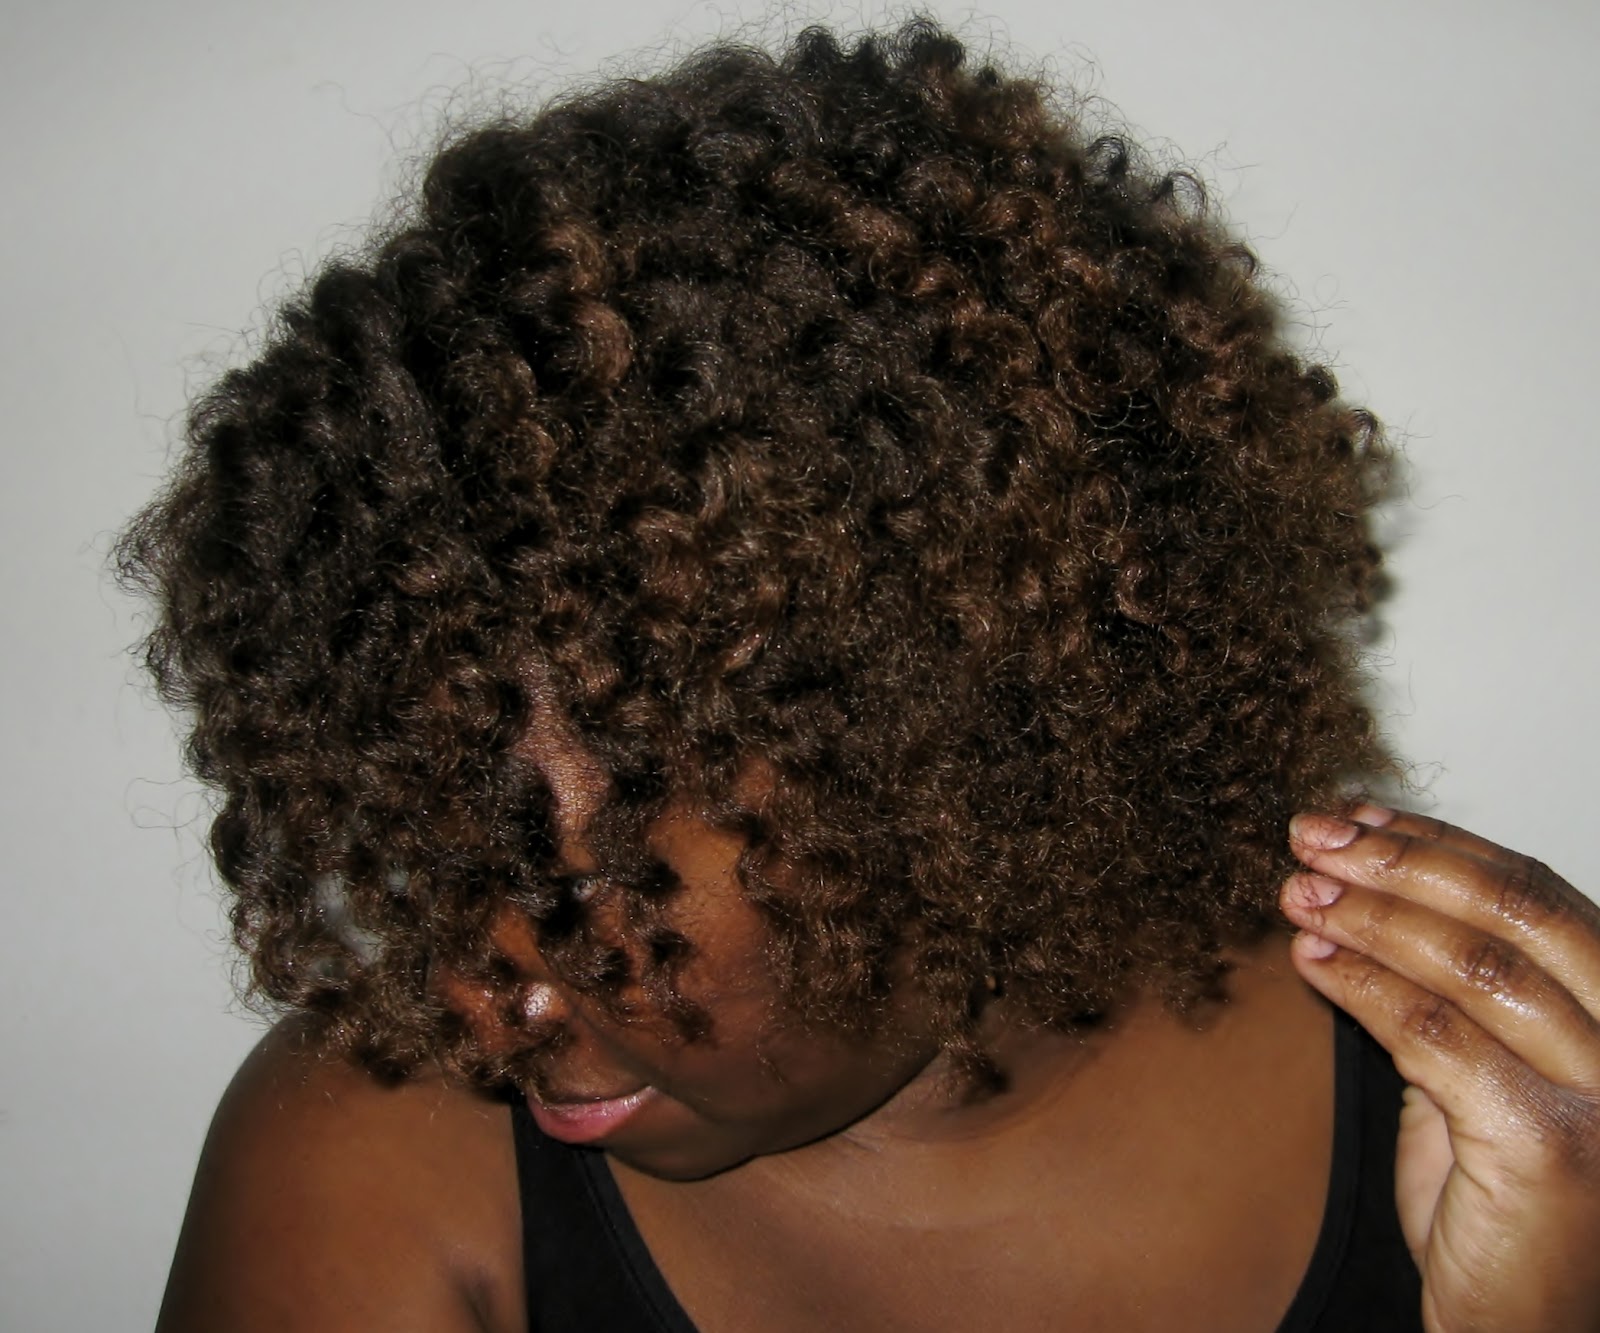
January 19, 2012
More Lazy Gal Looks and Tips!
See how to rock the lazy gal look casual or glam! Also hear tips on creating the perfect twist-out, improvising styles, creating accessories, and remaining encouraged!
January 7, 2012
Learning the Lingo: Parabens & Preservatives
Preservative
\pri-ˈzər-və-tiv\

First things first:
According to Merriam-Webster's dictionary, to preserve is:
- To keep safe from injury, harm or destruction (protect);
- To keep alive, intact, or free from decay (maintain);
- To keep or save from decomposition; or
- To keep up and reserve for personal or special use
Preservatives are synthetic (man-made) or non-synthetic (natural) substances added to foods, cosmetics, medications, woods, etc. to ward off microbial growth, mitigate chemical decomposition (ie UV damage, oxidation) and extend product shelf-life; in other words, to preserve them.
Parabens (methyl, propyl, butyl, and ethyl) are additives commonly used to preserve commercial cosmetics. Parabens are irritating to many and while the jury is still out, there is much debate as to whether or not they are carcinogenic (cancer-causing). Other synthetic preservatives commonly used in cosmetic (including hair) products include imidazolidinyl urea, and diazolidinyl urea.
For more on synthetic preservatives, check out the Organic Consumers Association article:
Ten Synthetic Cosmetic Ingredients to Avoid
Natural preservatives:
Vinegar, alcohol, tea tree oil, vitamin E, honey, lemon, sugar and salt are all natural preservatives. When making DIY products, add a bit of tea tree oil, honey or vitamin E to preserve your mixture.
For more on natural preservatives, check out All Natural Beauty's article:
Natural Preservatives

Now what?
Check the ingredients in your product list. While I'm not bothered by the inclusion of parabens, you may want to avoid them if you have sensitive skin. Similarly, if you've developed unexpected scalp irritation. you may want to consider if parabens could be the culprit. Nowadays, most hair lines offer an all or mostly natural product line. Personally, I love the SheaMoisture, Organix or Renpure lines!
Was this helpful?
January 5, 2012
Mislabeling of "Natural" Products
To be or not to be natural. That is the question!

So the bottle says "pure", "natural" or "organic". Great! You can trust it, right? Well, not quite!
But Uncle Sam has my back!
Ya think? Despite commonly held belief, there is no federal regulation of the cosmetics industry. The following comes directly from the Food and Drug Administration (FDA) website.
- The FDA's legal authority over cosmetics is different from other products regulated by the agency, such as drugs, biologics, and medical devices. Cosmetic products and ingredients are not subject to FDA pre-market approval authority, with the exception of color additives.
- [Moreover,] cosmetic firms are responsible for substantiating the safety of their products and ingredients before marketing. Failure to adequately substantiate the safety of a cosmetic product or its ingredients prior to marketing causes the product to be misbranded unless the following warning statement appears conspicuously on the principal display panel of the product's label: "Warning--The safety of this product has not been determined."
Said in layman's terms....
- The industry is self-regulated. The FDA's scope of oversight is limited to labeling but even there, the cosmetic industry has an out. By placing the statement " The safety of this product has not been determined" on the label; manufacturers waive most of their legal liability.
- Combine the lack of cosmetic industry oversight with the USDA's loose standards for describing a product as "herbal", "natural" or "organic" and you can appreciate why it's important for you to take responsibility for knowing the ingredients in the products you purchase.
Lets try it.....
Example 1: Queen Helene Royal Curl, Curl Shaping Creme

Despite that "all natural" label, below are the ingredients to this product.
- Aqua (Water), Glycerin, Pectin, Agave Rigida (Sisal) Extract, Aloe Barbadensis Leaf Juice, Camellia Sinensis Leaf Extract, Royal Jelly Extract Carbomer, Disodium EDTA, Ethylhexyl Methoxycinnamate, Tocopheryl Acetate, Triethanolamine, Phenoxyethanol, Potassium Sorbate, Sodium Benzoate, Amyl Cinnamal, Benzyl Benzoate, Benzyl Salicylate, Butylphenyl Methylpropional, Citronellol, Geraniol, Hexyl Cinnamal, Limonene Linalool, Fragrance (Parfum).
Do those ingredients sound "all natural" to you? Me neither!
- If you can't pronounce it, and you can't define it, you probably shouldn't use it!
- Also remember, ingredients are listed in order of concentration. The more of an ingredient in a product, the closer it is to the top of the list. Given this, I see a lot of less than healthy ingredients in more than acceptable levels!
- Example: Check out the -ates and -ols in the ingredient list. That usually means sulfates and alcohols. These ingredients dry, strip and damage your hair!
So you be the judge. After reading the ingredient list, would you call this product "all natural"? Would you buy it?
Example 2: Softee Coconut Oil Hair and Scalp Conditioner

It says it's pure!
Pure coconut oil. Awesome! An all natural product, right? Slow your roll curlfriend! While the coconut oil used in the product reports to be 100% pure, the product is not made up of just coconut oil! Nope! In fact, the product is mostly petroleum. In truth, the label should read petroleum plus high-quality coconut oil. But that would be silly, right? The goal is to SELL the product.
So what's the moral?
Caveat emptor or buyer beware! While the examples above come from the low-end of the product scale, these labeling practices are used across the board. Don't be fooled because a product costs a lot, comes from a high-end manufacturer or because it has a bottle beaming with beautiful fields of grain, tropical rain forests laden with coconuts, or models with long, luscious, locks of strong, shiny, weave...I mean hair! Before you purchase ANY product, do yourself (and your hair) a favor- read the ingredients!
- Food for thought: While others have been slow to take their lead, effective June 1, 2011, Whole Foods Market began requiring suppliers labeling their product as "organic" to be in compliance with the USDA standards for certified organic products. While this does not impact the inclusion of genetically modified ingredients (GMO), it's a start! Read more on Whole Food's policy change here>>> Whole Foods Stance on Organic Labeling
Learn the lingo!
Great! You're convinced that reading ingredient lists is important. Now you need to know what you're reading. Not sure of your skill level? Here's a quick quiz:
- Do you know the pros and cons between using rain, filtered, tap or deionized, water?
- Do you know how temperature and humidity impact the function of humectants?
- Do you know why parabens, emollients, emulsifiers and PEGs are commonly used in products?
- Do you know when to use and when to avoid alcohols, mineral oil/petroleum, silicones, sulfates and proteins?
- Do you know the difference between an essential oil and a carrier oil?
Did you pass? If you did, GREAT! If you didn't, don't sweat it! While you don't need to become a scientist, you should spend some time familiarizing yourself with some of the more common ingredients, such as those listed above. Not sure where to get started? No worries!
Whether you're a natural newbie or a curly connoisseur, you can learn/brush-up on it all in The ABC's of Hair Speak.From African black soap to zinc, I've got you covered! You'll lean all the lingo to help you navigate your way to healthy hair including the ingredients, the techniques and some of the other over-hyped hair stuff; like hair typing, protective styling, transitioning and more.
Does your mind tend to go blank once you step into the hair aisle? Not a problem. You can own your very own bound copy of The ABC's of Hair Speak for $20. This 5x7 booklet includes colored pictures for 30+ term! It's the curly consumers best friend! Just email your request to journeytomyroots@live.com. You'll never shop unarmed again!
See the video version of The ABC's of Hair Speak here
Wanna hear more?
Check out Curly Chronicles' take on the inappropriate use of the "natural" label.
- Learn more about the FDA's limited oversight of the cosmetic industry here: http://www.fda.gov/Cosmetics/GuidanceComplianceRegulatoryInformation/ucm074162.htm
- Learn more about the "Coming Clean" project and they're effort to lobby for truth in labeling: http://www.organicconsumers.org/bodycare/index.cfm
- I was rather surprised but according to the "Coming Clean" project, the following brands market their products as "organic" but they do not have enough organic ingredients to be USDA certified and they use ingredients that would never be allowed in USDA certified products.
January 3, 2012
Winterize Your Routine!
You've winterized your wardrobe.
How about your hair routine?

Unlike the humid days of summer, winter air is much drier. Given this, even the healthiest head can experience dry hair and tight, itchy scalp. Avoid it all by winterizing your routine. Here's how...
- Go ahead, take the appetizer and the desert! Treat your hair to an appetizer and dessert. In hair lingo we'd call that a pre-poo and deep condition treatment, respectively. Both spoil your hair with extra vitamins, nutrients, proteins and moisture! This is one time when pigging out is a GOOD thing!
- Learn all about pre-pooing and deep conditioning (including a DIY recipe) here>>> Pre-pooing 101
- Kick the -ates! If you haven't already, move to a sulfate-free shampoo during the winter. Sulfates are detergents. While great for cleansing, sulfates are very drying to the hair! So shelf the sulfates during the cold months.
- Learn all about sulfates here>>> Sulfates 101
- Hold the humectants! Humectants are substances that attract water. Great, right? Not always. During the humid days of summer,humectants extract water from the air. During the arid or dry days of winter, humectants extract water from your hair! Humectants commonly found in hair products include Panthenol (Pro-vitamin B), propylene glycol , PEG compounds, hydrolyzed proteins (ie elastin, collagen, silk keratin), vegetable glycerin, honey, and sugars (ie fructose, sucrose).
- Swap the jacket for a coat! You've packed away your thin summer jacket for a thick winter coat. Do the same with your oils! Replace your thin oils like grapeseed and extra virgin olive oil for heavier/thicker oils and butters like castor, coconut, jojoba oil and shea butter.
- Learn about natural carrier and essence oils here>>> Oils 101
- Are you using the right technique when applying your oils? Click here to find out >>>Applying Oils
- Stop showing so much skin! Protective styles are great year-round but just like summer dresses and sandals, skin is best show in the summer! If your protective style exposes your scalp to the dry winter air (ie cornrows, bantu knots, etc.), you'll likely notice that your scalp feels tight . If you're wearing extensions, you'll notice it even more because the added hair steals moisture from your own hair and scalp. This is especially true if you're using fake or cheap hair. Much like cloth, fake or cheap hair will absorb additional moisture from your hair. So invest in good hair and as much as possible, choose styles that shield your scalp and ends.
- Learn more on protective styling here>>> Protective Styling 101
- Spread the Love! While too heavy for the sweaty days of summer, applying sealant to your scalp is a great way to prevent and relieve winter's tight and itchy scalp. Run a little of your winter oil over your well-watered scalp! Need something thicker/heavier than oil? Prefer the feel/consistency of hair grease? Make your own!
- Try it!: Mix shea butter and natural oil to your desired consistency. A ratio of 2: 1 is fairly consistent with hair grease. Example: Add 1/2 cup of shea butter with 1 cup of your favorite oil(s). Be sure to add a bit of honey or tea tree oil to your mix. Both are natural preservatives! Just remember. If you use tea tree oil, use sparingly. Like all essential oils, a little goes a LONG way!
- Buy it!: Not a DIY type? Try my product! Quench is a mixture of shea butter, essential oils, aloe vera gel, vegetable glycerin, minoxidil (Rogaine), honey, vitamin E and natural fragrances. Got thirsty tresses? Quench them!
- Pick it up under the "shop" tab of my blogsite!
- Note: NEVER apply synthetic hair grease to your scalp. Unlike natural sealants, the main ingredient in hair grease is typically mineral oil or one of its cousins; petrolatum, petroleum and paraffin. Shea butter feeds your hair vitamins and minerals. It protects with natural sunscreens and it stimulates with natural anti-oxidants. Mineral oil does none of these things. Applying it to your scalp seals in water but it suffocates your hair from receiving added water and oxygen. It attracts dirt and it requires a harsh detergent to be removed....and this will lead to further drying.
- Learn more about grease here>>> Hair Grease 101

- Cover it up! Despite the myth, wearing wet hair in the winter does not cause colds. Colds come from viruses, not cold weather! Nonetheless, it's good to cover your head to keep warm and more importantly, to slow down the rate at which moisture escapes from your hair. So cover it up!
- Cotton and wool suck your hair dry so only cover your head with hats, hoods and scarves that are lined with silk or satin. Not lined? Fret not my friend. Check out this quick tip video for a work-around!
Voila! Your routine is now winterized!
What are some steps you take to winterize your hair routine? Share in the comments or come over to the chat room to share! >>> CHAT!
Cover it up!


Cotton sucks the moisture out of your hair so sleeping on cotton pillowcases or covering your head with a cotton bandanna/scarf is a sure-fire way to ensure dryness! Retain your moisture by covering your hair with a silk/satin scarf or bonnet each and every night.
- Quick Tips!
- Hate having your head covered? No problem! Use silk/satin pillowcases!
- Too tired? No problem! Shove a spare silk/satin bonnet into your pillowcase. This way, when you're so tired that you fall right into bed, you can pull it out of the pillowcase and slip it onto your head; and you don't even have to lift your head or open your eyes to do it!
- Tend to fall asleep on the couch? Shove a spare bonnet in the couch cushion too. This way you can protect your hair when lying on the couch too!
Just please, please, please don't be one of these ladies wearing pajamas and a head scarf or satin bonnet in public. Ewwwwwwwwwwwww!
My Hair Regimen

I have to admit, since going natural, I'm often asked how I get my hair to grow so quickly. Admittedly, I too have been pleasantly surprised.That said, it's important to point out that everyone's hair grows at its own pace. The science says hair grows at an average rate of 1/2 inch per month. And while there are lots of factors affecting how quickly your own hair will grow (i.e, genetics, health status, etc), I can tell you this much. Your hair can only grow at its best rate when it's healthy. And the best way to get healthy hair is to use healthy hair practices. You can find tutorials, testimonials, (and sometimes tantrums) about my natural journey on my YouTube channel, JourneytomyRoots. Check it out! In the meantime, here are some key pointers:
- Education: I say it all the time, education and moisture- the two keys to a successful natural journey! When I started my natural hair journey, I spent tons of time watching YouTube videos, reading blogs, researching the science and experimenting with products. I quickly figured out that while a lot of the stuff is hype, you do start to see a few practices which are almost universal. You also find some true-blue, keeping-it-real, naturalistas whose advice you can trust. Some of my favorite channels are
- Education: Kimmaytube, All Things O'Natural, JourneytomyRoots
- Styling: Naptural85, SimplYounique, CurlyChronicles
- Hair Hilarity: Chescaleigh, Africanexport
- Huffington Post recently published a list of the top 5 Natural Hair YouTube Channels (based subscriber count). Click here to check it out>>> Top 10 Natural Hair YouTube Channels
- Natural Review recently published their choice of the Top 10 Natural Hair YouTube Channels. Click here to check it out>>> Top 5 Natural Hair YouTube Channels
- Learning the science and the lingo: While you don't have to become a scientist, an important step in going natural is learning the science behind common hair products; specifically, which ingredients to look for and which to avoid. You can always tell a true naturalista because we don’t just smell the product, we read the labels! Natural oils, mineral oil, parabens, silicones, sulfates, and more! They're all common and they all have a lot to due with your hair's health! You can learn all about ingredients and other natural hair terms (ie cowashing, TWA, protective styling) in my tutorial "The ABC's of Hair Speak". Yes, the video is a bit long but it covers over 30 natural and healthy hair topics. Break it up. Watch a little now, a little later. It's a great place to get your feet wet without having to go to multiple sites, blogs, channels or pages. Click here to check it out>>> The ABC's of Hair Speak
- Moisturizing: Water is the ONLY means to moisturize the hair so it's important to cleanse your hair at least once per week. Versus shampooing, I no-poo or cowash my hair meaning I wash with conditioner or sulfate free shampoo. I cowash/nopoo between 2-4 times per week (more in the summer, less in the winter). My fave cowash products are Herbal Essences Hello Hydration conditioner and Shea Moisture Moisture Retention Shampoo. Yeah, I tried a lot of the pricey products but at the end of the day, I found they were just that, pricey while not necessarily offering any visible difference. That said, you still need to experiment to find out what works best for you. Just don’t buy into the belief that it has to be something expensive. And remember that what works wonderfully for one person may not work at all for you...even if their hair appears to be "just like yours". Learn all about cowasing and nopooing in my tutorial here>>>Cowashing & Nopooing 101

- Handle with care (and sparingly): Like so many naturals, this one is hard for me. I call it hand-in-hair-itis! I love playing with my newly natural crown of coils. Unfortunately, curly hair does not want to be fussed with too much. At best, it makes the hair frizzy and at worst, it damages the hair. So try to give your hair a break. Handle it sparingly and as much as possible, use protective styles. Learn all about protective styling in my tutorial here>>> Protective Styling 101
- Transitioning: I didn't do any transition styles but I did and still do keep a wig around for the days when I'm too lazy to do my hair or not ready to take out my twists. These days you can get an inexpensive wig at any local hair shop. Check it out...
- Protecting: Always cover your hair with a silk or satin scarf at nighttime; never cotton. Cotton draws the moisture out of your hair and skin.
While not all, these are the key hair practices I have used religiously since going natural. They've definitely worked at helping me to grow longer, stronger, healthy hair...and doing so quickly.
Til next time fellow Journeyers!!!!!!!
January 2, 2012
Mastering Moisture (And So Much More!)

It's the key to healthy hair yet it's the thing most naturals struggle with; moisture. Fret no more my friends. Here's a step-by-step overview of what you need to do and NOT do to keep your hair moist and your journey successful!
Water, Water, Water
- I say it all the time; water is the ONLY source of moisture. They're part of a good moisture routine but oils and butters seal. They DO NOT moisturize. You can add oils, butters and grease (ugggh!) until the cows come home but unless and until you get enough water into your routine- it's all for naught as your hair will always be dry.
- To ensure adequate water, you should be washing your hair AT LEAST once per week. For a lot of us, this is completely counter to what we were taught growing up. But not washing your hair enough is the reason so many of us have poor or stunted hair growth. If I had a nickel for every time I heard someone say "My hair never grows past X length", I'd be rich.
- While only you can determine how often is enough, I wash my hair at least once per week and at times, daily. For me, the frequency varies based on a variety of factors. I wash more in the summer than in the winter due to sweating. I wash more if I've used products that include mineral oil. I wash less as my hair gets longer. Let your hair be your guide.
- Between wash days, rinse your hair or let the shower steam lightly mist it. I do this daily but even if you only do it once, that's one more drink of water that your hair will enjoy!
- Afraid the steam is gonna give you a bushy mess or ruin your style? Try this quick tip as a work-around >>> http://youtu.be/vhcx2hPJsos
- Make your own moisturizing sprtiz to keep on hand. It's simple! Mix water, vegetable glycerin, natural oil and a bit of conditioner in a spray bottle. When your hair is feeling dry, whip it out and get it in! This tip is especially handy during the summer when you're spending more time in the sun.
- Click here to see a tutorial on making your own vegetable glycerin spritz>>> http://youtu.be/nFwdQDymGvQ
Yes! Sweat the Technique!
- A technique common among naturals is that of cowashing or nopooing. Cowashing and nopooing are gentler than shampooing but strong enough to keep your hair clean. By being more gentle, cowashing and nopooing are less drying than shampoo.
- Conditioner + Wash = Cowash
- To cowash is to clean the hair with conditioner instead of shampoo. Like shampoo, most conditioners include sulfates as their cleansing detergent. They simply do so in much lower concentrations. Because of this, cowashing cleanses without stripping.
- Example: Pick up a bottle of Herbal Essences Hello Hydration Conditioner! It's my fave and a huge fave in the natural hair community!
- Cleansing - shampoo = Nopoo
- To nopoo is to clean the hair with something other than shampoo. While it may be conditioner (cowashing), it may be something else.
- Example: African black soap is a natural, nopoo cleanser. Wen is a nopoo cleanser.
- Learn more on cowashing and nopooing in my tutorial Cowashing 101
School yourself on Sulfates!
- You've nailed frequency. You've mastered technique. The next thing to consider is products. Most products cleanse with detergents called sulfates. Sulfates can be extremely drying. Given this, you want to select products that are sulfate-free or that use milder sulfates.
- Example: SheaMoisture Moisture Retention shampoo is a great sulfate-free product.
- Example: A fave product for me and many naturals is Herbal Essences Hello Hydration. Instead of the extremely harsh sodium lauryl sulfate (SLS), Hello Hydration cleanses with the much milder Behentrimonium methosulfate (BMS) or Behentrimonium chloride. Because BMS/BC are milder, they are much less drying to your hair.
- Need to learn about sulfates? Check out my tutorial Sulfates 101 here>>> http://youtu.be/GIM-HM7xx8w
- Your skin and your hair have a natural moisture sealant built in. It's called sebum. Sebum makes the skin (ie at your roots) and the hair waterproof; preventing it from drying out. Having too much sebum makes the hair greasy. Having too little makes the hair dry. Washing your hair is meant to remove EXCESS sebum; not ALL sebum.
- If your hair is squeaking, that means it's been stripped of sebum. Stripped hair is dry hair and dry hair is damaged. So despite what you've been told, "squeaky clean hair" is not a good thing.
- Want to know more about the cons of squeaky clean hair? Check out this quick tip!>>> http://youtu.be/Ryr3Y3DbwVg
Turn down the temp!
- Just like your skin, your hair is damaged when you scorch it with water that is too hot so turn down the temperature. Use lukewarm water instead.
Chill out
- Great! You've gotten the water in. Now you want to lock it in. How? After you've washed your hair, finish by rinsing with a quick blast of cool/cold water. This closes the cuticle, preventing the water from so easily escaping/evaporating/drying out. Cool/cold water also helps smooth the hair. This is why most blow dryers now come with a cool air button!
Lock it in!
- The next (and best) way to lock in your water is by applying a sealant. A good sealant not only locks in water, it also feeds your hair vitamins and minerals. It protects your hair from sun damage. It stimulates cell regeneration and it wards off microbes. These factors are why sealants such as shea butter and natural oils are much better than synthetic sealants that use mineral oil, petrolatum, petroleum or paraffin; namely hair grease.
- I seal in my moisture with my Quench by Journey to My Roots. Quench is a rich souffle of unrefined shea butter, extra virgin olive oil, almond oil, grapeseed oil, castor oil, cholesterol, aloe vera gel, vegetable glycerin, minoxidil 2% (aka Rogaine), vitamin E, honey, peppermint oil, lavender oil and love! I like to "grease my scalp" with it and to run it over the shaft of my hair. Pick up your order of Quench today!Learn more, read/see reviews and order it here: http://journey2myroots.blogspot.com/p/shop.html

- When I need something lighter, I use grapeseed oil. It's a carrier oil so it's perfect for day to day use.
- Learn about natural oils (including the difference between essential and carrier oils) here>>> http://youtu.be/XVhOY0PzOLI
- Again, oils, butters and grease DO NOT MOISTURIZE! Only water moisturizes your hair. It may be cheap and it may be convenient, but unlike natural sealants, grease does not feed, protect or stimulate your hair. You may not see it immediately but rest assured, if you are using grease regularly, your hair is going to pay the price.
- Learn more about the pros and cons of using grease here >>>http://youtu.be/LpFWCOUPqBA
It's getting hot in herrrrrre!
- Heat dries the hair out so use heat as little and as low as possible. This past November made two years in my natural journey. In that time, I've yet to press/flat-iron my hair and I've only used the blow dryer a handful of times. Don't get me wrong, like anyone else, I'm looking forward to eventually wearing my hair in a straightened style. I'll just use precaution when I do. Here are some tips!
- Blow-drying:
- Invest in a good blow dryer. I know those Gold N' Hot dryers are cheap but trust me, there's a reason! A ceramic ionic tourmaline dryer is the top of the line. Ceramic adds shine and protects the hair from heat damage and frizz. Ionic technology creates negative ions which smooth the hair, lock in moisture and reduce drying time. Tourmaline boosts the effects of the ionic technology giving you more shine and faster drying time. As mentioned earlier, you'll also want a dryer that includes a cool air button. This helps to set your hair and add shine.
- Use the lowest heat setting necessary. If you can use the low/cool or medium/warm setting, do so!
- Use a diffuser. A diffuser spreads the heat thus reducing damage.
- Only dry as much as necessary. Instead of drying your hair until it's bone dry, dry it to the point of being lightly damp. Let it air dry the rest of the way. If you're doing a style that requires being fully dry, take the opposite approach. Air dry as much as possible and then diffuse/blow dry to finish it off! Both of these steps help to ensure your hair is dried without being dried out.
- Learn more about selecting a blow dryer here>>> http://www.ehow.com/how_2019579_choose-blow-dryer.html
- Flat-ironing/pressing/Dominican blow-outs:
- Don't do it too frequently. If you're applying heat too often (ie every weekend), you're on the path to dry, damaged hair.
- Consider a professional. You can certainly do it yourself but at least the first time, head to a professional so you can learn the appropriate way to straighten your hair including the tools, products and techniques you should use.
- Use the right tools and products. While many people still use pressing combs, ceramic ionic tourmaline flat irons are much better for the hair. Ceramic and tourmaline help keep hair smooth while straightening by producing negative ions. Negative ions counter the positive electrical charges produced by friction on hair during styling. Positive electrical charges dry out hair by causing hair cuticles to open. Negative ions help repair this damage. Be wary of flat irons with nano-ceramic plates. Nano-ceramic plates are metal plates with small particles of ceramic that can easily scrape off.
- Learn more about selecting a flat iron here>>> http://www.ehow.com/how_6614699_compare-hair-flat-irons.html
- Use a heat protectant. You should NEVER apply heat to your hair without first applying a heat protectant. This can be a natural oil or a commercial product. Keracare, Chi and Design Essentials all seem to get great reviews!
- Interested in straightening your hair? See my first time flat ironing here. It worked out beautifully!
Wait a cotton-picking minute!
- While convenient, avoid drying your hair by wrapping it in a cotton towel. Be it a pillowcase, a head scarf or a towel; anything cotton dries! Ever noticed how frizzy your hair is after you take that cotton towel off? Try these techniques instead.
- Air dry! It's the absolute best way to avoid over-drying your hair. Hate the drip? Use a terry cloth headband or tie a bandanna around your forehead.
- Wring your hair out. Twist the hair into a bun, wringing out as much water as possible as you do. Hair to short? Shake your head really good before jumping out of the shower.
- Still too wet? Use the tee-shirt method to dry your hair. It's not as healthy as air drying but it's better than using heat and better than using a cotton towel.
- Learn about the tee-shirt method here>>>
Who gon' check me boo?
- Like the drying detergents of shampoos, many styling products include ingredients which can be drying. Check your product's label. As much as possible, you want to limit or altogether avoid products that include drying alcohol (because some alcohols ARE good), sulfates and synthetic humectants (ie mineral oil).
- Humectants are sealants whose chemical makeup causes them to attract and tightly bind water. Great, right? Well not necessarily. Depending on which has more to offer, humectants attract or pull water from one of two places; from the air (good) or from your hair (bad)!
- In humid environments, humectants steal water from the air. This adds moisture to your hair (good) but it also leads to swelling and frizz (bad).
- In arid environments, humectants steal water from your hair. This causes the hair to become dry and possibly damaged.
- As sealants, humectants also lock moisture in. If you have fed your hair sufficient water, humectants are great for sealing that water in. If you have not fed your hair sufficient water, humectants can wreak havoc because by sealing the hair, they prevent additional water from penetrating the hair's cuticle.
- So which ingredients are humectants? Shea butter, vegetable glycerin and honey are all natural humectants. Mineral oil, petroleum, petrolatum and paraffin are synthetic humectants.
- In addition to attracting water, natural humectants feed your hair vitamins and minerals; protect your hair with natural sunscreens; and stimulate hair growth with anti-oxidants.
- While synthetic humectants also attract water, they do not feed, protect or stimulate your hair.
- Because they are not water-soluble, humectants require a detergent to be removed from the hair.
- Because they can lock out moisture and because they require detergents to be removed, humectants, particularly synthetic humectants can contribute to dry hair.
- Learn more about mineral oil, petroleum, petrolatum and paraffin (including a demo) in my tutorial Mineral Oil 101>>>
Cover it up!

- Cotton sucks the moisture out of your hair so sleeping on cotton pillowcases or covering your head with a cotton bandanna/scarf is a sure-fire way to ensure dryness! Retain your moisture by covering your hair with a silk/satin scarf or bonnet each and every night.
- Hate having your head covered? No problem! Use silk/satin pillowcases!
- Too tired? No problem! Shove a spare silk/satin bonnet into your pillowcase. This way, when you're so tired that you fall right into bed, you can pull it out of the pillowcase and slip it onto your head....and you don't even have to lift your head or open your eyes to do it! Shove a spare bonnet in the couch cushion. This way you can protect your hair when lying on the couch too!
- http://journey2myroots.blogspot.com/2012/01/quick-tip-cover-it-up.html?utm_source=BP_recent
Learn it, Love it!
- The other thing you can do to ward off dryness and maintain moisture is to learn your hair's quirks and to tailor your routine around it. The only way you can do this is to spend time with your hair AND spend time learning about the most common ingredients. So many naturals go broke, bald, crazy or back to relaxers because they become disappointed after trying things based on the "I heard" approach. Well what you heard is all fine and dandy but fact is, what works for one head may not work for another. So while reviews are great, the best way to know which products and techniques are worth trying, is to spend some time learning a few basics.
- Example: Got eczema? Try using products with African Black Soap. Do oils give you irritation or acne? Try jojoba oil instead. While called oil, it's actually a wax! It's also the oil that most closely mirrors your skin's natural sebum. Got itch? Tea tree oil and aloe vera should be on your wish list. Hair thinning? Try castor or rosemary oil. See! When you know the basics, you can make better decisions for your hair; and your pocketbook!
- Not sure where to get started? Check out The ABC's of Hair Speak. It covers 30+ natural hair topics including everything I've shared in this blog post. Check it out here>>>
- Learn more about reading an ingredient list here>>>
All done now, right? Not quite! While a large part of maintaining moisture and healthy hair has to do with products and technique, there are a couple of other things to think about as well.
Think outside the box!
Think outside the box!
- Consider the non hair factors.
- Example: Summer air has humidity. Winter weather does not (well not as much!). Given this, you're much more likely to notice dryness in the winter than in the summer.
- Example: Diet/Exercise/Stress: Each of these impact your health and anything that impacts your health, impacts your hair! Be sure you're eating right (supplementing with vitamins when beneficial), getting exercise and minimizing stress! If not, your hair will show it!
- Example: Genetics! Your genes play a role in everything about you- including your hair!
- For more on the non-hair factors, check out this great demonstration by YouTube queen and natural hair guru Kimmaytube >>> http://youtu.be/4_LKGqydL8s
See a professional!
- We naturals pride ourselves on being DIY queens, bathroom beauticians, curly chemists, etc. That's great! But don't be foolish. If you're taking all the right steps and you STILL aren't achieving healthy hair, head to a professional! Be it a beautician, a dermatologist or a primary care doctor, there are times when the input of a professional is necessary!
- Example: Eczema, seborrheic dermatitis, alopecia, etc are medical issues not styling issues. Medical issues are only solved by medical intervention! Learn more about alopecia here >>>
So that's it (LOL!). I know it sounds like a lot but really it isn't . It's all about establishing a healthy hair routine. Incorporate these tips into your routine and you're on your way to hair that is moist, healthy and strong! I promise!


You can learn more on ingredients, techniques, tools and more on my YouTube channel. Be sure to stop by and subscribe. See ya there!
Subscribe to:
Posts (Atom)